If you plan on hiking a mountain, it is always a good idea to have a paper map and the ability to read it correctly. I have been searching for decent topographical maps in Japan for a few months. From Tokyo bookstores to Hokkaido bookstores I haven’t been able to get a physical map in 1/25000 scale.
After some searching online and trying to use the Japanese Geographical Survey website, I found Trailnote mapping and route planning software. It’s free software for Mac that does what its’ name suggests and lets you plan hiking routes. It’s very easy to use after a play around but the interface is all in Japanese. If you are planning a hiking trip in Japan, then this software is invaluable.
If you can’t read Japanese, don’t let the language barrier put you off. I will show you a step-by-step guide and provide some translation for the main parts that I use.
Features
- Print 1/25000, 1/15000, 1/12500, 1/10000 topographic maps (B5-A3 size)
- PDF output of topographic maps, output for convenience stores
- Route input/edit (move, delete, add, wrap, flip, thin out, etc.)
- Real-time display of elevation graph, reacquisition of elevation
- GPX file input / output
- Printing magnetic north lines, latitude/longitude lines, and route lines
- Change colour of contour lines, roads, buildings, rivers, etc., emphasize roads
- Add / edit waypoints
- Printing topographic maps with waypoints and elevation graphs
- Ascending, descending colour-coded printing, peak and col display
- Displaying multiple tracks
- GPX data (track / waypoint) list display
- Track division / combination, time correction
Installing
Installation is very standard and simple.
- Download the software from the Trailnote website.
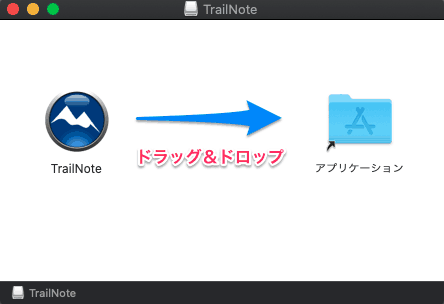
- Click the .dmg file to begin the install.
- When prompted, drag Trailnote to Applications.
Now it is installed, we click on the Trailnote icon in Launchpad. There will be a security error on first opening because the software was not installed from the App store.
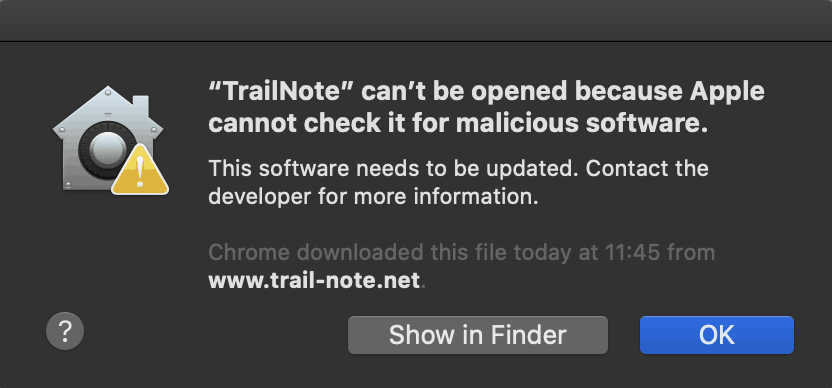
If we click ‘Show in Finder’ we can Right-Click Trailnote or Control-Click to ignore the security error.
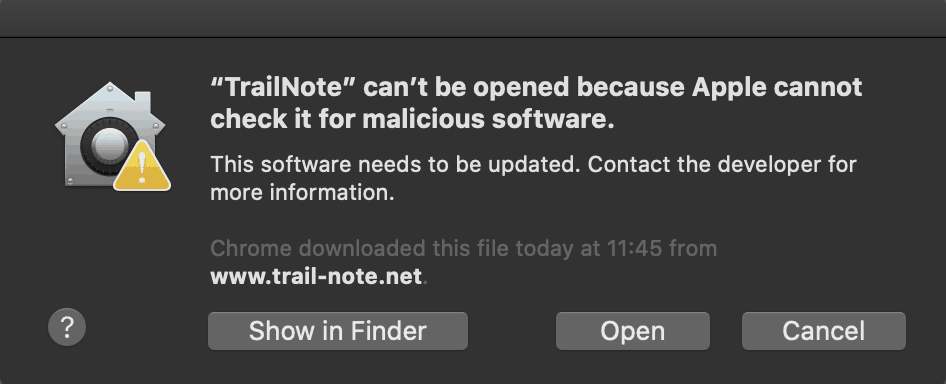
By clicking Open here we will dismiss the message and open the App. You won’t see the error again after we click Open from this screen.
Planning a Route
On the main screen, there is a scale slider on the left. You can click the + or – buttons or click in the coloured boxes to change the map scale.
On the right, we have a few icons.
- Globe – Start Page
- Square – Print Area Selection
- Folded Paper – Print Preview
- Spanner – Print Settings
- Pencil – Enter or Edit a route
- Arrow – Enter a route
- Dots – Edit Waypoints
- Flag – Set Endpoint
- Note – Display waypoint list
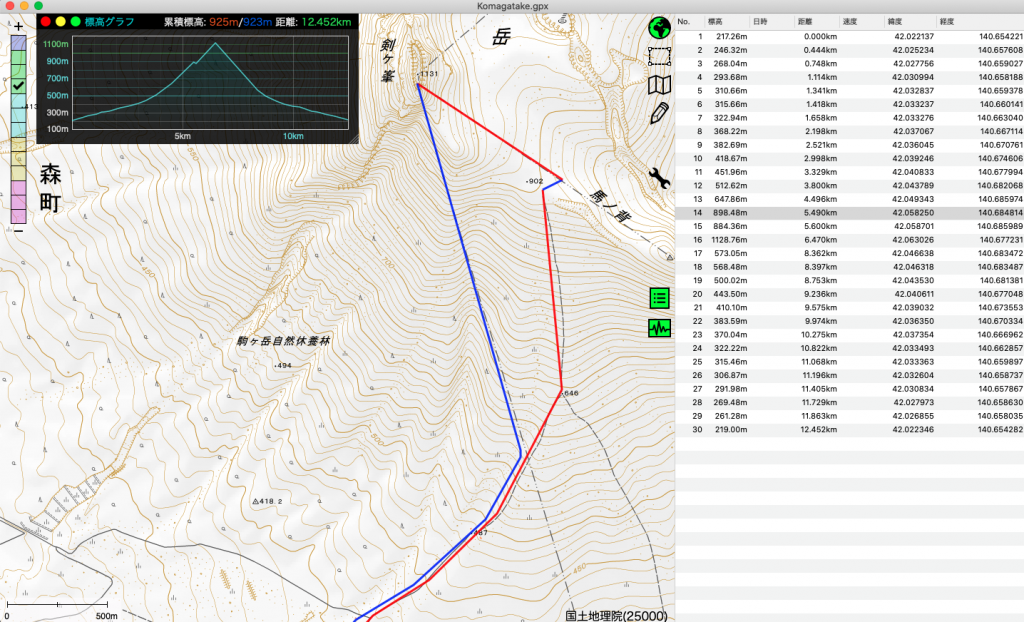
- Elevation – Displays Elevation Graph
- Back Arrows – Deletes the last step
- Trash – Clears the whole route

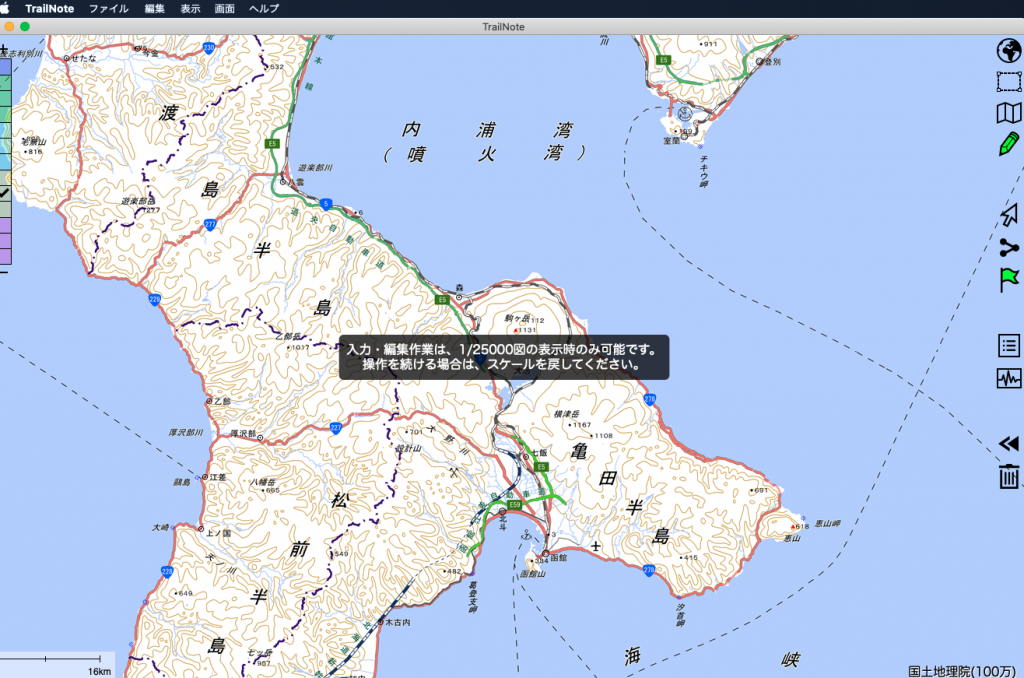
First thing to do is move the map to the area where you want to plan the route. It may be easier to zoom out to get the general location then zoom back in to begin. It should be noted that if your scale is above 1/25000 then the route planning won’t work. There will be a popup to alert you to this.
Once you have found your preferred location, click on the Pencil icon then click on the map where you want the route to begin. You should see an S appear to indicate your start position. From here it is simply a case of moving the cursor along the route and clicking where you want to make waypoints. Click the Flag icon to set the Endpoint.
If you want to adjust any waypoints, you can click on the Dots icon. You can then move waypoints around the map to where you wish. This is helpful, for example, if you want to follow a road more precisely.
You can see the route is represented by red and blue lines. The red line is for the ascent and the blue for descent. These can be changed within the page options which I will cover in the next section.
Printing
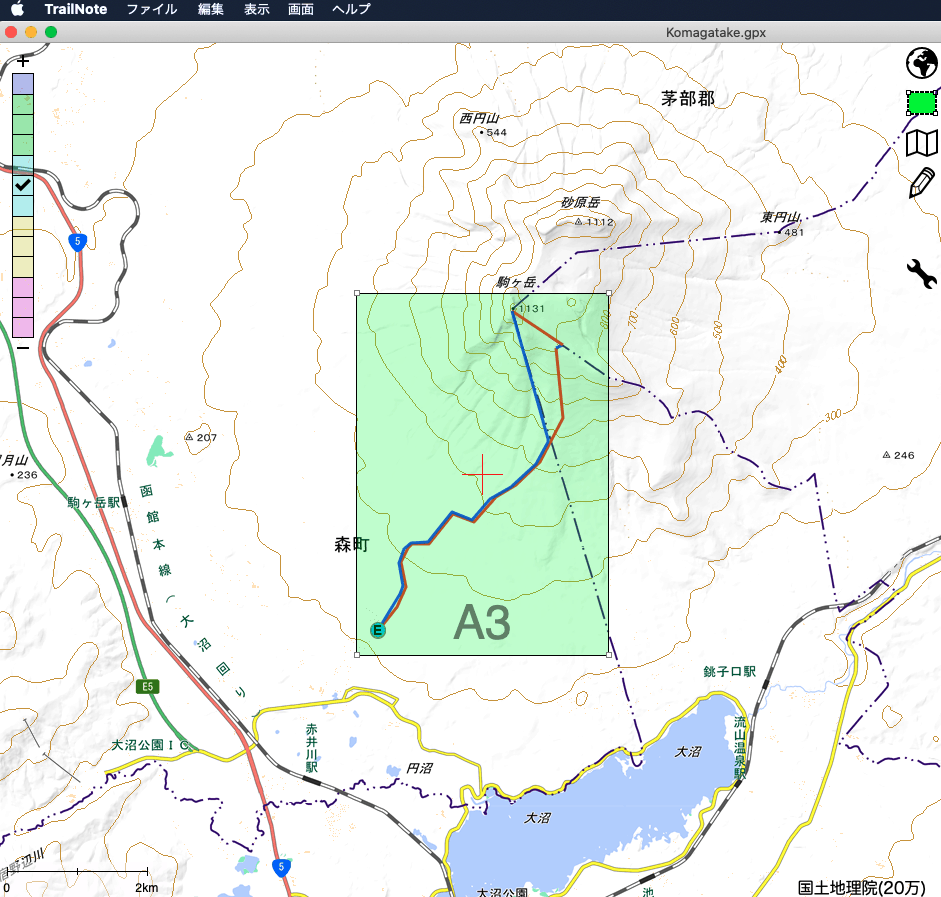
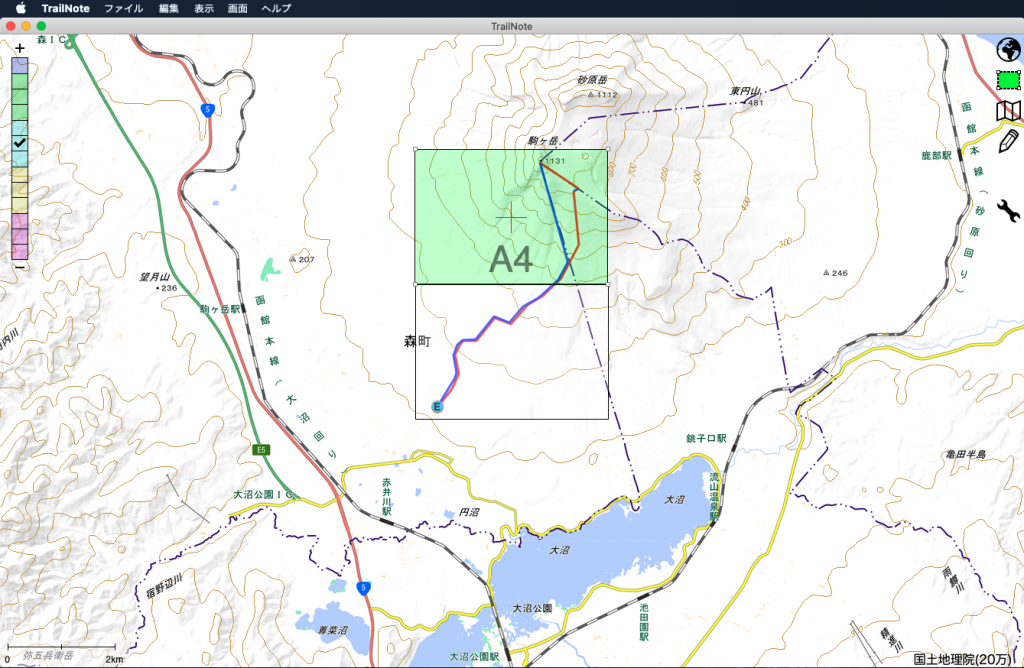
Once the route is planned and we are happy with it, we can set the print options. Firstly, let’s set the print area. By clicking on the Square icon, it highlights the area which will be printed in green. We can move this green area with the mouse to cover the route. The covered area will change depending on the selection of Portrait or Landscape mode from the print settings. To change it, click the Spanner icon and look for the second option on the list – 用紙方向
Select 横 for Portrait and 縦 for Landscape.
Once you have the print area selected, click on the Folded Paper icon for a print preview.
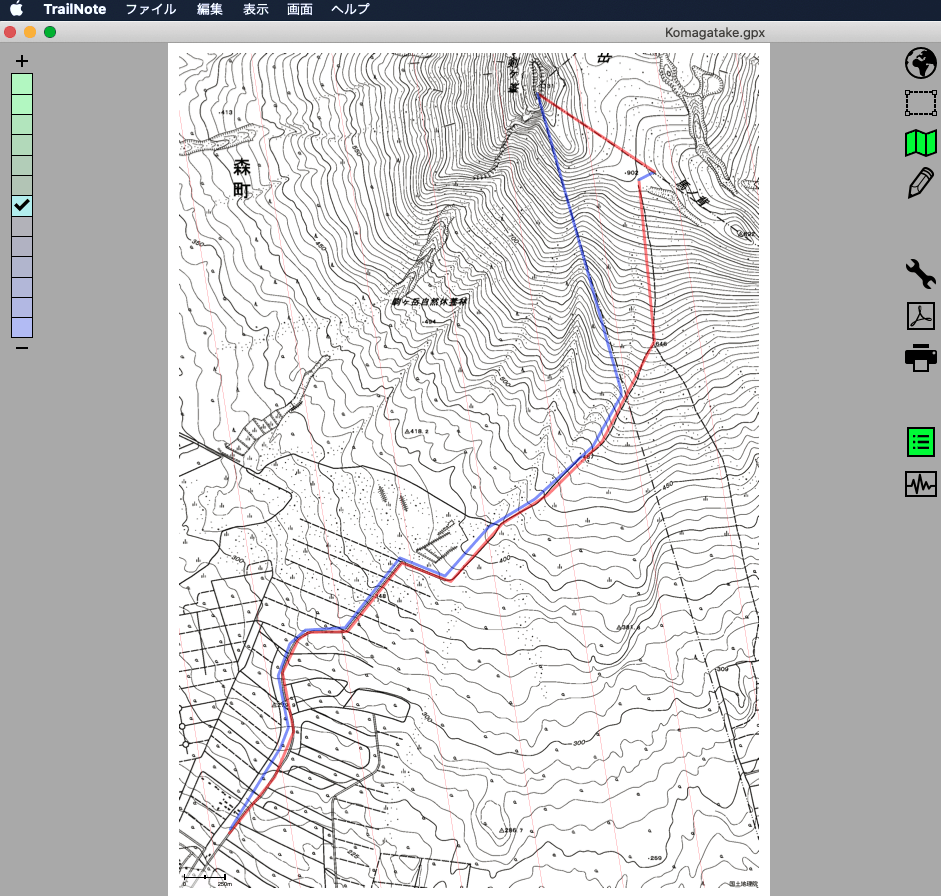
I find the contour lines much easier to read when printed from this software compared to the GSI map tool.
If you are happy with everything, then click on the Printer icon to send the job to your printer or click the Adobe icon to save the map as a PDF.
I recommend printing in A3 to get the whole route on one page but if you only have access to an A4 printer or you have a long route, then it’s possible to print multiple pages.
To print on A4 just follow the same steps as the A3 printing. After printing the first page, click the Square icon again to go back to print preview. This time when you move the print area, you will see the outline of the first page you printed. This allows you to line up the next page to make sure you have the whole route printed.
Click the Folded Paper icon then select the Print icon. You should now have the complete route printed, you can tape them together if you want to or just use it as single sheets.
Page Settings
The basic settings we just talked about are enough to enable you to plan a route and print it but we can add extra detail such as Magnetic North lines.
Click on the Spanner icon or open the File menu (ファイル) and click Page Settings (パジ設定). We have lots of configurable options in here.
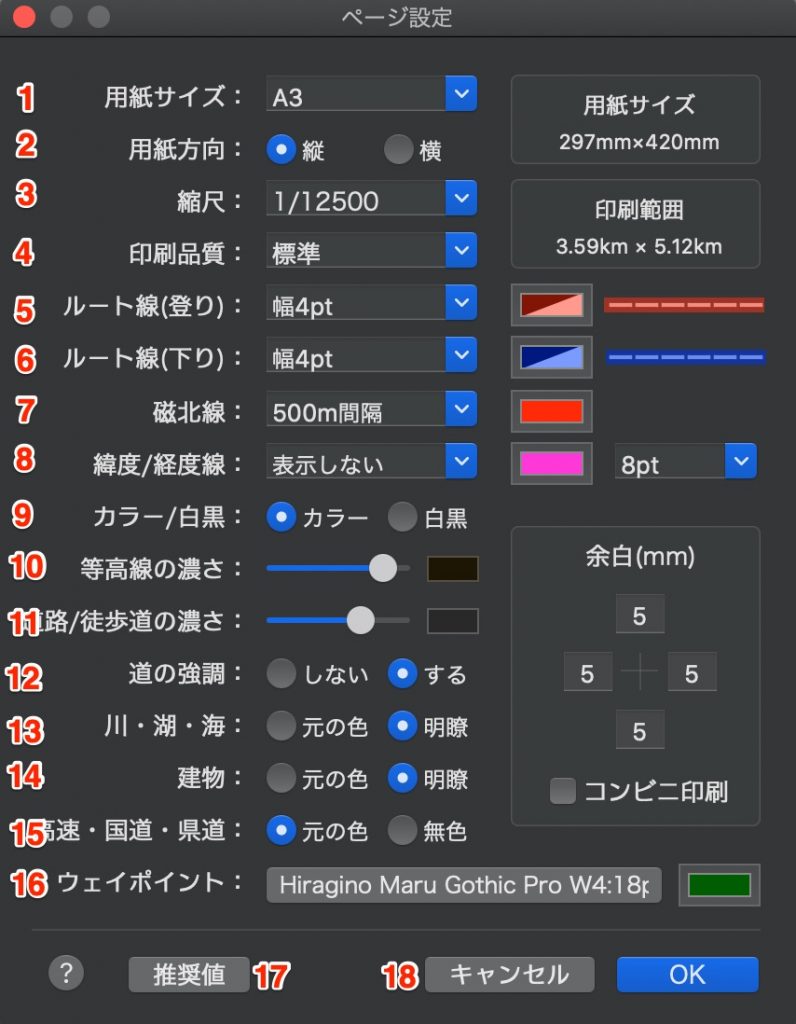
Translation:
- Paper Size.
- Paper Orientation.
- Scale.
- Print Quality.
- Route Line Ascending – Set colour of line and thickness.
- Route Line Descending – Set colour of line and thickness.
- Magnetic North lines – Set range, colour or switch off.
- Latitude/ Longitude Lines – Set range. colour or switch off.
- Colour/Black and White – Print options.
- Contour Density – Change the darkness of contour lines.
- Road/Walkway – Change the thickness of road/walkway lines.
- Road Emphasis – No – Yes.
- Water Colour – Original colour or clarity.
- Building Colour – Original colour or clarity.
- Expressway/Highway – Original colour or clarity.
- Waypoint Font.
- Set Default.
- Cancel.
I hope you find this guide useful and try the software if you are planning a hike in Japan.